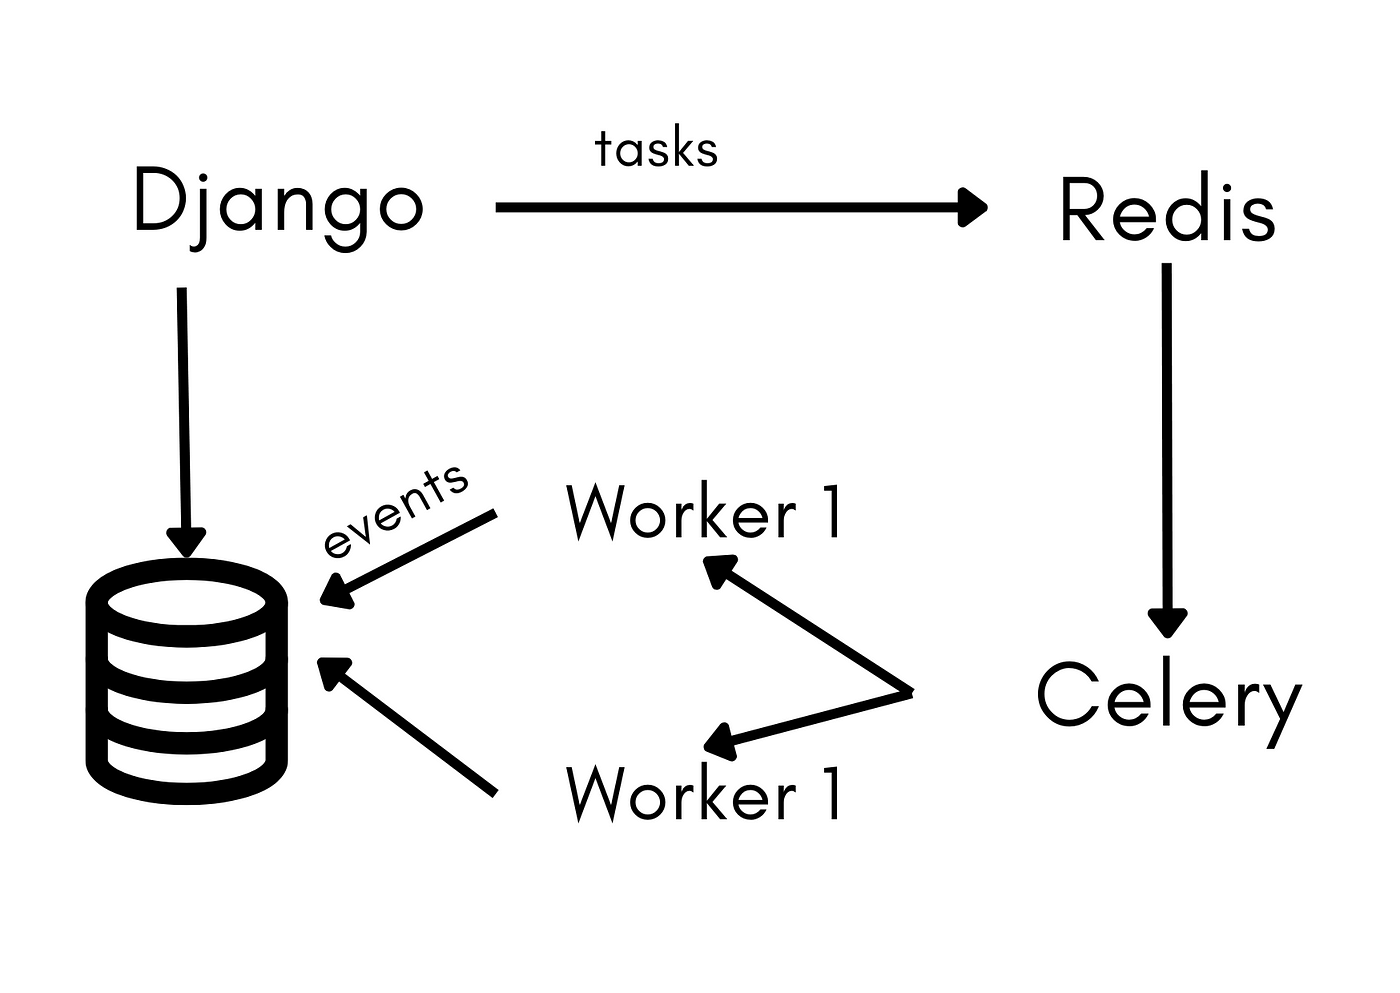
How to Schedule Tasks in Python with Celery and Redis.
Jan, 02 2025

In modern Python applications, task scheduling plays a crucial role in improving efficiency and managing background processes. Whether you're sending emails, processing large dataset, or running periodic jobs/task scheduling can make your applications more powerful and user-friendly. In this blog, we’ll explore how to schedule tasks using Celery and Redis, using sending email as an example.
What is Celery?
Celery is an asynchronous task queue/job queue based on distributed message passing. It’s designed to handle background jobs and run periodic tasks, making it ideal for applications that need to offload heavy or repetitive operations.
Key Features of Celery:
Asynchronous Task Execution: Run tasks in the background without blocking the main application.
Task Scheduling: Schedule periodic tasks, such as daily reports or automated emails.
Task Retry: Automatically retry failed tasks.
Why Redis?
Redis serves as the message broker for Celery. It’s a high-performance in-memory data store that facilitates communication between your application and Celery workers. Redis ensures fast, reliable message delivery, making it a popular choice for Celery backends.
Key Features of Redis:
In-memory Data Store: Redis is extremely fast as it stores data in memory, making it ideal for caching and quick lookups.
Pub/Sub Messaging: Supports publish/subscribe messaging, which is essential for communication in distributed systems.
Persistence Options: Offers data persistence through snapshots and append-only files.
High Availability: Provides replication and automatic failover for high availability.
Scalability: Redis can be scaled vertically or horizontally to handle high loads.
Prerequisites
Before we start, ensure you have the following installed:
Python 3.7 or higher
Redis server
pip
Set up a virtual environment
python -m venv venv
source venv/bin/activate  # On Windows: venv\Scripts\activate
Installation
Install Celery and the Redis Python client:
pip install 'celery[redis]'Configure Celery
Create a Celery Application In your Python project, e.g: create a file named celery_app.py:
from celery import Celery
from celery.schedules import crontab
from celery import Celery: Imports theCeleryclass, which is used to create a Celery application instance. The Celery app manages tasks, workers, and communication with the message broker (Redis in this case)from celery.schedules import crontab: This imports thecrontabfunction, which is used to define schedules for periodic tasks (e.g., tasks running every minute, hour, day etc.)
app = Celery("send_email",broker='redis://localhost:6379/0')app = Celery("send_email", ...): Creates a new Celery app instance with the name"send_email". This name is primarily for identification and logging.broker='redis://localhost:6379/0': Specifies Redis as the message broker, using the default Redis URL (localhost:6379) and the first Redis database (0).
app.conf.beat_schedule = {
    'send-daily-email': {
        'task': "celery_app.send_email",
        'schedule': crontab(minute="*"),  # execute every minute
        'args': []  # No arguments since send_email() doesn't accept args
    },
}app.conf.beat_schedule: Configures the periodic tasks for the Celery app. It holds a dictionary of tasks that will be executed at specified intervals by thecelery-beatscheduler.'send-daily-email': This is a unique identifier (name) for the periodic task.'task': "celery_app.send_email": Specifies the fully qualified name of the task to be executed. Here, it points to thesend_emailfunction in thecelery_appmodule. This must match the actual location of the task definition.'schedule': crontab(minute="*"): Uses thecrontabfunction to schedule the task to run every minute. Theminute="*"means the task will run at the start of every minute.'args': []: Specifies any positional arguments to pass to the task function when it's executed. Sincesend_email()doesn't accept any arguments, this is an empty list.
Scheduling Tasks
import smtplib
from email.message import EmailMessage

email = ""
password = ""
recipient_email = ""
smtp = ""
port = ""

@app.task
def send_email():

    print("Task started: Sending email...")

    try:
        msg = EmailMessage()
        msg.set_content("This is a test email sent from Celery and Redis")
        msg['Subject'] = "celery and redis test"
        msg['From'] = email
        msg['To'] = recipient_email

        with smtplib.SMTP(smtp, port) as smtp: # example using gmail
            smtp.starttls()
            smtp.login(email, password)
            smtp.send_message(msg)

        print("Email sent successfully!")

    except Exception as e:
        print(f"Error sending email: {e}")
- The `send_email` function is decorated with `@app.task`, to make it a Celery task.
- The task will then get executed as many times as specified in the celery app schedule.
Testing the Setup
celery -A celery_app worker --loglevel=info
celery -A celery_app beat --loglevel=info
You should then see the task being executed:
Conclusion
By combining Celery and Redis, you can build efficient, scalable task scheduling for your Python applications. Whether you’re sending emails, generating reports, or managing other background processes, this setup can handle it all code available on github.